Tampa (BLOOM) – Who doesn’t love a scoop of creamy, dreamy ice cream? The frozen treat has been captivating taste buds for centuries, and the best part is, you can create your own delectable concoctions right in the comfort of your own kitchen. In this article, we’ll explore the process of making irresistible ice cream from scratch. By following these step-by-step instructions, anyone can create their own frozen bliss in the form of homemade ice cream.
The Basics of Homemade Ice Cream: To understand the art of making homemade ice cream, let’s start with the key ingredients. The dairy base, which typically includes milk and cream, forms the foundation of most ice cream recipes. However, for those with dietary restrictions or preferences, there are also fantastic non-dairy alternatives available. Sweeteners, such as sugar, honey, or maple syrup, add the necessary sweetness. And let’s not forget the flavorings! Whether it’s a classic vanilla extract, rich cocoa powder, or vibrant fruit purees, the flavorings elevate your ice cream to a whole new level.
Equipments needed for the process: Before we dive into the steps, it’s essential to gather the necessary equipment. If you have an ice cream maker, that’s fantastic! If not, don’t worry—we have alternative methods that work just as well. Along with the ice cream maker or alternative churners, you’ll need mixing bowls, a whisk, a spatula, and freezer-safe containers for storing your frozen delights.
Selecting the Perfect Recipe: Now that you have your ingredients and equipment ready, it’s time to select the perfect recipe for your homemade ice cream. You’ll find a vast array of recipes to choose from, ranging from classic flavors like vanilla, chocolate, and strawberry to creative combinations like salted caramel or mint chocolate chip. There are also recipes available to cater to various dietary needs, such as vegan or gluten-free options. Consider your preferences and level of complexity you’re comfortable with, whether you’re a beginner looking for simpler recipes or an adventurous spirit ready to take on more intricate creations.
Step-by-Step Process of Making Homemade Ice Cream:
- Preparing the ice cream base: Combine the dairy base, sweeteners, and flavorings in a mixing bowl. Whisk them until well incorporated, ensuring a smooth and consistent mixture.
- Chilling the ice cream base: Cover the bowl and refrigerate it for the specified time mentioned in the recipe. Chilling the base thoroughly enhances both the texture and flavor of your ice cream.
- Churning the ice cream: If you have an ice cream maker, pour the chilled base into the machine and follow the manufacturer’s instructions. Alternatively, for those without an ice cream maker, there are alternative methods available. One option is the hand-churning technique using a freezer-safe container. Another option is the bag method, where you place the chilled base in a sealed bag with ice and salt, then shake it until the desired consistency is reached.
- Adding mix-ins and swirls (optional): Take your ice cream to the next level by incorporating your favorite mix-ins such as chocolate chips, nuts, or cookie dough. Additionally, you can layer swirls of caramel, fudge, or fruit sauces to create a delightful surprise in every scoop.
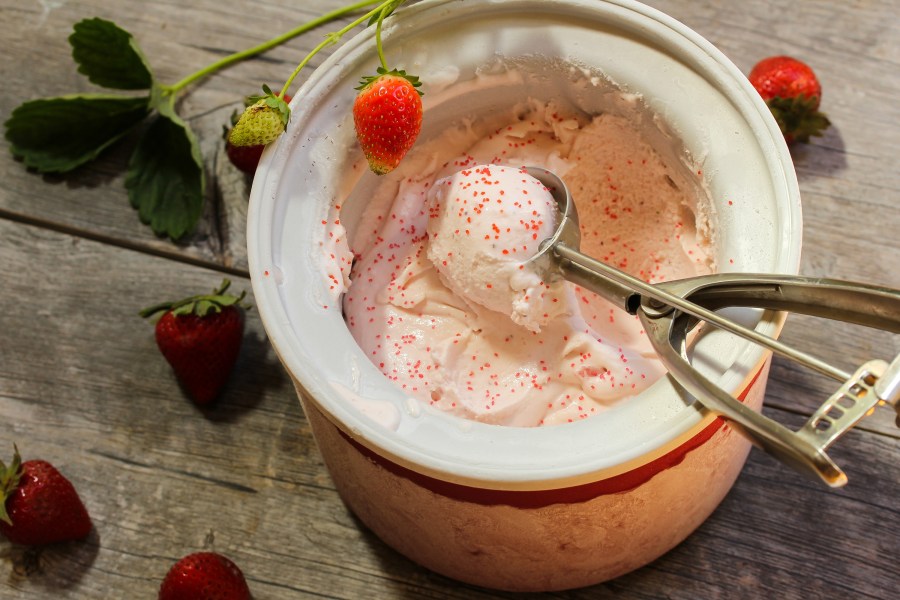
- Freezing and storing the ice cream: Transfer the churned ice cream into a freezer-safe container, cover it, and place it in the freezer until firm. Ensure proper storage to maintain the quality and prevent ice crystals from forming.
Tips and Tricks for Perfect Homemade Ice Cream: To help you achieve ice cream perfection, here are some tips and tricks:
- Properly chill the base before churning to ensure the best texture.
- Avoid over-churning, as it can lead to a loss of creaminess and result in iciness.
- Don’t be afraid to experiment with flavors and mix-ins to create unique combinations.
- Balance the flavors to achieve a harmonious blend.
- When serving, consider garnishing with complementary toppings like sprinkles, crushed cookies, or fresh fruit.
Ice Cream Makers
When it comes to making homemade ice cream, having the right ice cream maker can greatly simplify the process and enhance the results. Here are three popular types of ice cream makers available in the market, along with their pros and cons:
- Traditional Churners: Traditional churners, also known as hand-crank or manual ice cream makers, have been used for generations. These machines typically consist of a metal or wooden bucket, an inner canister, and a hand-crank mechanism.Pros:
- Nostalgic experience: Using a traditional churner brings a sense of nostalgia and charm to the ice cream-making process.No electricity required: These churners can be used anywhere, making them perfect for outdoor gatherings or when electricity is unavailable.Affordable: Traditional churners are often more budget-friendly compared to electric machines.
- Labor-intensive: Churning the ice cream manually requires physical effort and can be time-consuming.
- Limited capacity: Traditional churners usually have a smaller capacity, making them suitable for smaller batches of ice cream.
- Inconsistent results: Achieving a consistently smooth texture can be challenging without precise control over churning speed and temperature.
- Electric Machines: Electric ice cream makers are popular for their convenience and ease of use. These machines have an electric motor that churns the ice cream, eliminating the need for manual effort.Pros:
- Effortless operation: Electric machines do the churning for you, requiring minimal manual labor.Larger capacity: Electric machines typically have a larger capacity, allowing you to make larger batches of ice cream.Consistent results: The electric motor ensures a more consistent and evenly churned ice cream texture.
- Dependence on electricity: Electric machines require a power source, which may limit their use in certain settings.
- Higher cost: Electric ice cream makers tend to be more expensive compared to traditional churners.
- Bulkier storage: Due to their larger size and built-in motor, electric machines may take up more storage space.
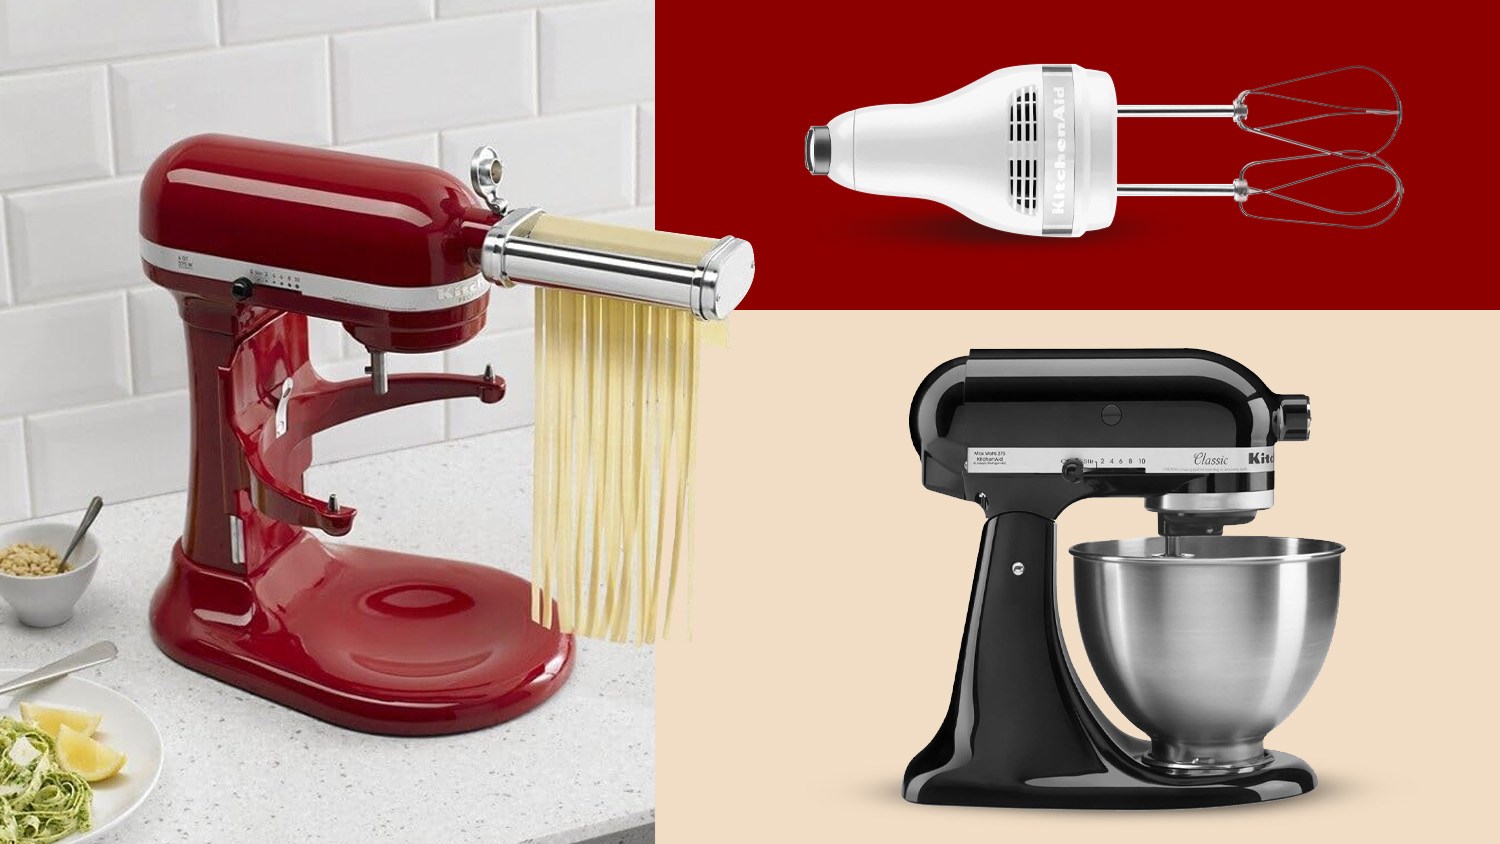
- Stand Mixer Attachments: Some stand mixers offer ice cream maker attachments that can be connected to the mixer’s head. These attachments consist of a freezer bowl and a paddle or dasher for churning.Pros:
- Versatile: Stand mixers are commonly used in kitchens, and having an ice cream maker attachment adds versatility to the appliance.Convenience: Attachments are easy to use and require minimal setup.Good results: The mixer’s powerful motor ensures efficient churning, resulting in smooth and creamy ice cream.
- Limited capacity: The size of the freezer bowl determines the batch size, which is typically smaller compared to dedicated ice cream machines.
- Requires pre-freezing: The freezer bowl needs to be pre-frozen before use, which adds an extra step to the process.
- Compatibility: Not all stand mixers have ice cream maker attachments available, so compatibility with specific models should be checked.
When choosing an ice cream maker, consider your personal preferences, budget, and the volume of ice cream you plan to make. Traditional churners offer a nostalgic experience but require more effort. Electric machines provide convenience and consistent results but at a higher cost. Stand mixer attachments offer versatility but have limitations on batch size. Assess your needs and select the ice cream maker that aligns best with your requirements. With any of these options, you’ll be on your way to creating homemade ice cream that’s sure to impress.
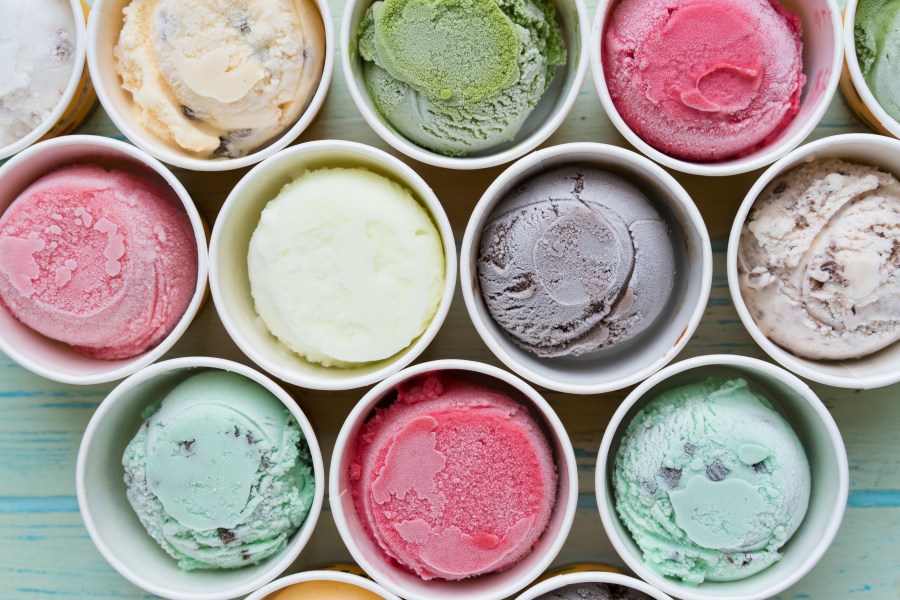
Here are some additional recipe ideas for unique and tantalizing ice cream flavors, along with suggested mix-ins and toppings to complement each flavor:
- Matcha Green Tea Ice Cream:
- Recipe: Infuse the ice cream base with high-quality matcha powder for a vibrant green tea flavor.
- Mix-ins: Add a handful of white chocolate chips or chopped pistachios for added texture and flavor.
- Toppings: Drizzle with a swirl of sweetened condensed milk or sprinkle with toasted sesame seeds for an extra touch of indulgence.
- Lavender Honey Ice Cream:
- Recipe: Infuse the ice cream base with dried lavender buds and sweeten it with floral honey.
- Mix-ins: Gently fold in chopped dried apricots or blueberries for a burst of fruity goodness.
- Toppings: Sprinkle with edible lavender buds or drizzle with a delicate honey lavender syrup for an elegant presentation.
- Olive Oil and Sea Salt Ice Cream:
- Recipe: Incorporate fruity extra virgin olive oil into the ice cream base and balance it with a touch of sea salt.
- Mix-ins: Fold in crushed shortbread cookies or chopped roasted almonds for a delightful crunch.
- Toppings: Sprinkle with a pinch of flaky sea salt or drizzle with a balsamic reduction for a sophisticated twist.
- Basil Lemon Sorbet:
- Recipe: Create a refreshing sorbet by blending fresh basil leaves, tangy lemon juice, and a simple syrup.
- Mix-ins: Add finely chopped fresh strawberries or diced watermelon for a burst of fruity juiciness.
- Toppings: Garnish with a basil leaf or a lemon zest twist for a pop of color and aroma.
- Coconut Lemongrass Ice Cream:
- Recipe: Infuse coconut milk with fragrant lemongrass stalks for a tropical and citrusy ice cream base.
- Mix-ins: Stir in toasted coconut flakes or candied ginger for added texture and flavor complexity.
- Toppings: Top with a sprinkle of toasted sesame seeds or a drizzle of lemongrass syrup to enhance the tropical flair.
- Cinnamon Toast Crunch Ice Cream:
- Recipe: Infuse the ice cream base with cinnamon and vanilla for a nostalgic cereal-inspired treat.
- Mix-ins: Crush a handful of Cinnamon Toast Crunch cereal and fold it into the ice cream for a delightful crunch.
- Toppings: Sprinkle with a pinch of ground cinnamon or drizzle with caramel sauce for a caramelized twist.
- Cardamom Rose Pistachio Ice Cream:
- Recipe: Infuse the ice cream base with aromatic ground cardamom and delicate rosewater for an exotic flavor combination.
- Mix-ins: Fold in chopped pistachios or crushed rose petals for a delightful crunch and visual appeal.
- Toppings: Garnish with a sprinkle of crushed pistachios or a drizzle of rose syrup to elevate the presentation.
Feel free to adjust the ingredient measurements according to your taste preferences and experiment with different mix-ins and toppings to create your own signature ice cream flavors. Let your creativity run wild and enjoy the sweet rewards of these unique and tantalizing frozen treats!
Congratulations! You’ve unlocked the secret to making irresistible ice cream from scratch. With the basics of homemade ice cream, the step-by-step process, and helpful tips, you have all the tools you need to embark on your own frozen bliss adventure. So, why not give it a try? Gather your ingredients, grab your favorite recipe, and let the magic unfold in your kitchen. Indulge in the satisfaction of creating homemade ice cream and enjoy the sweet rewards of your efforts. Frozen bliss awaits you!